Keto Ice Cream Cake
Keto Ice Cream Cake
If you are looking for a delicious keto ice cream cake that is perfect for a ‘celebration’, your search is over. This recipe is really versatile with the type of ice cream you use as well as with the flavours that you add to it. While I personally would rather make my own ice cream (it’s far superior to any that you will buy in the store) you can use store bought ice cream as well. Making your own ice cream is a lot cheaper as I’ve seen 500 grams/17 oz of sugar free ice cream sell for as much as $12 in the stores.
The combination of chocolate, fresh strawberries and vanilla in this recipe is absolutely divine. While you can mix up the flavours if you want to, I suggest that you try the recipe as it is first. Feel free to be a little more creative with the vanilla ice cream centre if desired. You have the option of leaving the strawberry ice cream as a swirl ice cream, or follow the instructions in the recipe to make a more even coloured strawberry ice cream, as pictured in this recipe.
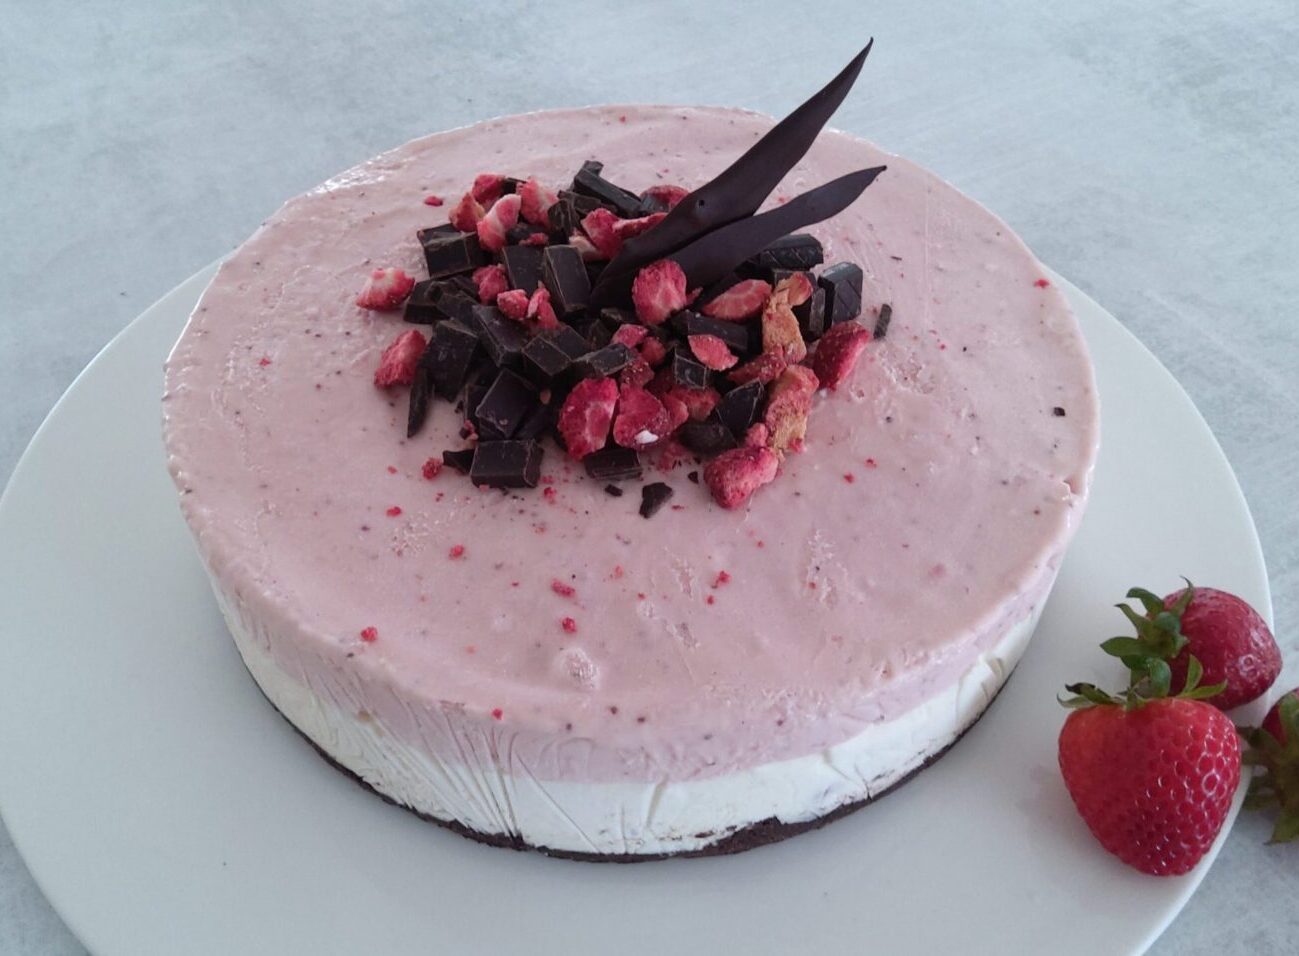
You also get to have fun with decorating the top as well. Use fresh or dried berries, chopped chocolate or chocolate drizzle (see below for recipe), chocolate coated nuts and/or fruit. I also love to make chocolate shards to poke out of the centre by drizzling melted dark chocolate onto a piece of baking paper and peeling off when set.

FLAVOURS
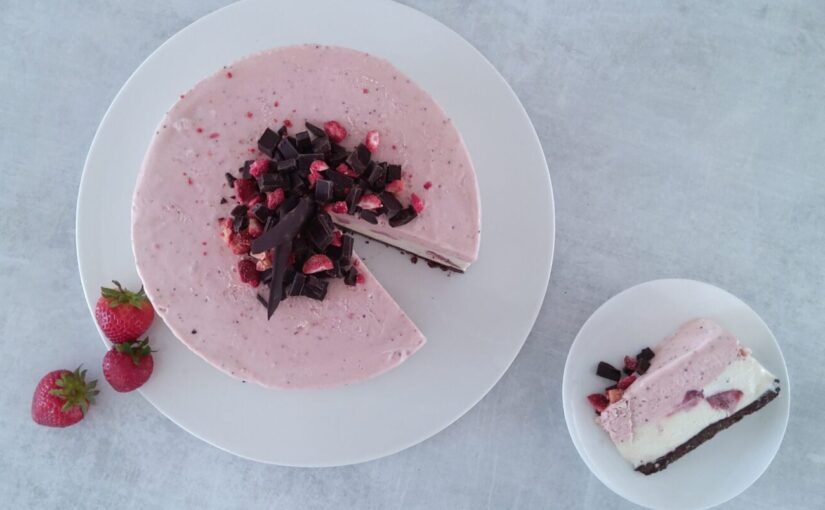
The featured keto ice cream cake has a chocolate biscuit base with a No Churn Vanilla Ice Cream centre that features fresh sliced strawberries. The top layer is in my opion, the ultimate ice cream ever, Strawberry Swirl Cheesecake Ice Cream. While the traditional recipe is a swirl ice cream, I blended the berries in as I wanted a more consistent pink colour. Feel free to leave as a swirl ice cream in this recipe or blend as I have.
FLAVOUR AND FILLING VARIATIONS
Feel free to custom make your own ice cream cake. For example, you can add anything to the vanilla centre, from chopped chocolate bars, nuts, frozen berries, sugar free lollies (sweets) and sugar free chocolate coated fruit and nuts. You can also switch out the ice cream and use your favourite store bought ice cream in any flavour. Alternatively you can choose from these additional ice cream recipes that feature on my blog, and mix them up for different flavour combinations.
Chocolate Ice Cream
Peanut Butter Ice Cream
CELEBRATION CAKE
This recipe makes the perfect celebration cake, and is good enough to feature on the table at Christmas time, especially if you decorate it in line with your Christmas theme. It’s always a crowd favourite with both the young and the old. Another recipe that is a little similar to this one is this fabulous recipe for a Low Carb Ice Cream Pudding. Either way, you won’t be disappointed as both recipes are fabulous and they are also really good fun to make as well.

If you find the time to make this recipe, don’t forget to tag me #ketohh #alowcarblowsugarlifestyle. It also really helps me if you use the star rating in the recipe to leave feedback. This helps push the recipe up in google searches etc which real benefit.
If you are an ice cream fiend, be sure to make the recipe for the Strawberry Swirl Ice Cream….trust me, you won’t be disappointed.
Kxx
Ingredients
Rich Chocolate Biscuit Base
- 1½ cups almond flour
- 4 tablespoons cocoa powder/dutch processed cocoa
- 3 tablespoons erythritol powdered, or sweetener of choice
- 1 teaspoon instant coffee powdered optional but recommended
- ½ teaspoon vanilla extract
- 50 grams dark chocolate
- 50 grams butter
- A pinch of salt
Strawberry Cream Cheese Ice Cream Layer-or ice cream of choice
- 1 batch Strawberry Swirl Cheesecake Ice Cream made 12 hours prior or 1 lt/34 oz store bought option
Vanilla Ice Cream Layer- or ice cream of choice
- 1 batch Vanilla No Churn Ice Cream made 12 hours prior or 1 lt/34 oz store bought option
- 1 cup strawberries hulled and quartered
- Optional extras- add additional chopped dark choc chips, sugar free sweets such as sugar free jubes, chocolate coated dried berries etc.
Instructions
- Prepare both of the ice creams according to instructions approximately 12 hours prior to constructing your cake or buy 2 tubs of your favorite sugar free ice cream.
- Make the chocolate biscuit base by lining a 9" spring pan base with baking paper. Combine all of the dry ingredients together in a small bowl. Melt the chocolate and the butter together and pour over the dry ingredients. Mix well and press the chocolate biscuit base into your prepared pan. Allow to set in the fridge for about 30 minutes prior to beginning the construction of your cake.
- Remove the vanilla ice cream (or preferred base flavour) from the freezer. Scoop out about 3/4's of the ice cream and allow it to soften on the bench until you can mix through your strawberries (and other additions if selected). Fold through gently to prevent staining. If the ice cream is soft enough you can just poke the berries through the ice cream.
- Spoon the vanilla layer onto your biscuit base, smoothing out the top, and place in the freezer until it is firm enough to add another layer. Cover with cling wrap or foil to prevent the ice cream from icing up. This could take anywhere from 2-4 hours.
- Once the vanilla layer has firmed up enough to add another layer, remove the strawberry ice cream from the freezer and allow it to defrost just enough so that you can scoop it out and spread it with a spatula. Remove the ice cream cake from the freezer to add the layer when the strawberry ice cream is soft enough and spread out evenly on top with a spatula.
- Return the cake to the freezer for another 3-4 hours or until it has frozen firmly. Make sure you cover the ice cream cake to prevent it icing up.
To Serve Your Ice Cream Cake
- Remove the cake from the freezer just prior to serving. If it is freshly made you may not need to let it rest but if it is too firm you may need to let it rest for 5-15 minutes prior to slicing.
- Garnish the top of the cake with dark chocolate chips, fresh, frozen or dried berries, shards of dark chocolate, chocolate coated nuts or berries. You can also create a chocolate drizzle with 60 grams/2 oz of dark chocolate that has been melted with a teaspoon of coconut oil added. Allow the chocolate drizzle to cool before drizzling over the cake just prior to serving.
- To refreeze leftovers, make sure you seal the cake it so that it doesn't ice up. I like to wrap it in clingwrap with a layer of foil on top.
Recipe Notes
Nutritional Information